
はじめに
サーバの運用で避けられないのが突然のディスク故障だ。
今回、NVMe SSD が実質的に故障し、I/O エラーや SSH セッション切断が頻発したため、
VM を Dell PowerEdge T340 側へ移行した。
この記事では、NVMeが壊れた Proxmox から、T340 へデータを安全に移行するための手順をまとめる。
1. 事前状況
旧 Proxmox(HP PC 中古)は以下の症状を示していた。
Webコンソールに接続できず、再起動するとext4 上で Input/output error
Found volume group "pve" using metadata type lvm2
2 logical volume(s) in volume group "pve" now active
/dev/mapper/pve-root contains a file system with errors, check forced.
Error reading block 3145732 (Input/output error) while reading inode and block bitmaps.

 /dev/mapper/pve-root: UNEXPECTED INCONSISTENCY; RUN fsck MANUALLY.
 (i.e., without -a or -p options)
fsck exited with status code 4
The root filesystem on /dev/mapper/pve-root requires a manual fsck

BusyBox v1.35.0 (Debian 1:1.35.0-4+b3) built-in shell (ash)
Enter 'help' for a list of built-in commands.
fsck で inode/block bitmap の読み取りエラー
(initramfs) fsck -y /dev/mapper/pve-root
fsck from util-linux 2.38.1
e2fsck 1.47.0 (5-Feb-2023)
Pass 1: Checking inodes, blocks, and sizes
Pass 2: Checking directory structure
Pass 3: Checking directory connectivity
Pass 4: Checking reference counts
Error reading block 3145732 (Input/output error) while reading inode and block bitmaps.  Ignore error? yes
Force rewrite? yes

Block bitmap differences:  -(3276800--3399657) -(4102656--4114431)
Fix? yes
Free blocks count wrong for group #97 (11778941, counted=11778940).
Fix? yes
Free blocks count wrong for group #128 (13082636, counted=13082637).
Fix? yes
Free blocks count wrong for group #125 (11569, counted=12560).
Fix? yes
Free blocks count wrong for group #127 (60264, counted=60267).
Fix? yes
Free blocks count wrong for group #54 (32351, counted=32578).
Fix? yes
Free blocks count wrong for group #28B (4396, counted=4397).
Fix? yes
Free blocks count wrong for group #1465360, counted=1464974).
Fix? yes
Inode bitmap differences: -2362926
Fix? yes
Free inodes count wrong for group #28B (4396, counted=4397).
Fix? yes
Free inodes count wrong (4499931, counted=4499931).
Fix? yes

/dev/mapper/pve-root: ***** FILE SYSTEM WAS MODIFIED *****
/dev/mapper/pve-root: 945383/495872 files (0.2% non-contiguous), 13799398/18214912 blocks
fsck実施後再起動でSSH接続できたのでNVMeのS.M.A.R.T.を確認したところ“Available Spare 30%” と異常値
Available Spare Threshold:閾値(10%)は超えているが、かなり寿命が近いことが判明(通常新品時は100%)
[2025-11-08 13:07:04.868] === START OF SMART DATA SECTION ===
[2025-11-08 13:07:04.868] SMART overall-health self-assessment test result: PASSED
[2025-11-08 13:07:04.868]
[2025-11-08 13:07:04.868] SMART/Health Information (NVMe Log 0x02)
[2025-11-08 13:07:04.868] Critical Warning:                   0x00
[2025-11-08 13:07:04.868] Temperature:                        32 Celsius
[2025-11-08 13:07:04.868] Available Spare:                    30%
[2025-11-08 13:07:04.868] Available Spare Threshold:          10%
[2025-11-08 13:07:04.868] Percentage Used:                    2%
[2025-11-08 13:07:04.868] Data Units Read:                    6,888,017 [3.52 TB]
[2025-11-08 13:07:04.870] Data Units Written:                 17,494,059 [8.95 TB]
[2025-11-08 13:07:04.871] Host Read Commands:                 121,347,257
[2025-11-08 13:07:04.871] Host Write Commands:                356,552,466
[2025-11-08 13:07:04.871] Controller Busy Time:               31,225
[2025-11-08 13:07:04.898] Power Cycles:                       109
[2025-11-08 13:07:04.898] Power On Hours:                     6,728
[2025-11-08 13:07:04.898] Unsafe Shutdowns:                   20
[2025-11-08 13:07:04.898] Media and Data Integrity Errors:    0
[2025-11-08 13:07:04.898] Error Information Log Entries:      0
[2025-11-08 13:07:04.898] Warning  Comp. Temperature Time:    0
[2025-11-08 13:07:04.898] Critical Comp. Temperature Time:    0
[2025-11-08 13:07:04.898]
[2025-11-08 13:07:04.898] Error Information (NVMe Log 0x01, 16 of 64 entries)
[2025-11-08 13:07:04.898] No Errors Logged
この状態は SSD の物理故障が進行中で、いつ OS が起動しなくてもおかしくない。
そのため、使用していなかった Dell PowerEdge T340(HDD 1TB)に Proxmox を新規構築し、全VMを移行する方針とした。
全体の仮想マシン数を把握する
qm listで仮想マシン数を確認する。
root@pve:/dev# qm list
   VMID NAME                 STATUS     MEM(MB)    BOOTDISK(GB) PID
    100 12.2-WindowsServer2025 stopped    8192             500.00 0
    101 12.115-ESXi-8.0U3    stopped    16384             32.00 0
    102 windows11            stopped    8192              32.00 0
    104 12.3-RHEL9.5         stopped    2048              32.00 0
    105 RHEL9.2              stopped    2048              32.00 0
    106 12.15-RHEL9.5        stopped    4096              32.00 0
    107 VM 107               stopped    8192             500.00 0
    108 12.100-OracleLinux-R9-U5 stopped    2048              32.00 0
    109 12.11-RHEL9.5        stopped    2048              50.00 0
    110 12.13-OracleLinux-R9-U5 stopped    4096              32.00 0
    111 12.14-RHEL9.5        stopped    4096              32.00 0
2. Proxmox の VM 容量を把握する(Data% が重要)
lvs で LVM の実使用量を確認する。
root@pve:/dev# lvs
  LV                              VG  Attr       LSize    Pool Origin        Data%  Meta%  Move Log Cpy%Sync Convert
  data                            pve twi-aotz-- <141.57g                    92.96  3.93
  root                            pve -wi-ao----   69.48g
  snap_vm-108-disk-0_DONE_INSTALL pve Vri---tz-k   32.00g data vm-108-disk-0
  swap                            pve -wi-ao----   <7.54g
  vm-100-disk-0                   pve Vwi-a-tz--    4.00m data               14.06
  vm-100-disk-1                   pve Vwi-a-tz--  500.00g data               6.32
  vm-100-disk-2                   pve Vwi-a-tz--    4.00m data               1.56
  vm-101-disk-0                   pve Vwi-a-tz--   32.00g data               2.07
  vm-102-disk-0                   pve Vwi-a-tz--    4.00m data               14.06
  vm-102-disk-1                   pve Vwi-a-tz--   32.00g data               96.34
  vm-102-disk-2                   pve Vwi-a-tz--    4.00m data               1.56
  vm-102-disk-3                   pve Vwi-a-tz--   32.00g data               0.00
  vm-102-disk-4                   pve Vwi-a-tz--   32.00g data               34.79
  vm-104-disk-0                   pve Vwi-a-tz--   32.00g data               6.89
  vm-105-disk-0                   pve Vwi-a-tz--   32.00g data               100.00
  vm-106-disk-0                   pve Vwi-a-tz--   32.00g data               14.40
  vm-107-disk-0                   pve Vwi-a-tz--  500.00g data               0.01
  vm-108-disk-0                   pve Vwi-a-tz--   32.00g data               11.07
  vm-108-state-DONE_INSTALL       pve Vwi-a-tz--   <4.49g data               19.46
  vm-109-disk-0                   pve Vwi-a-tz--   50.00g data               8.96
  vm-110-disk-0                   pve Vwi-a-tz--   32.00g data               16.06
  vm-111-disk-0                   pve Vwi-a-tz--   32.00g data               12.99
Proxmox の LVM-thin は “割り当て容量ではなく、Data% が実使用量” を示す。
例:vm-100-disk-1 500.00g Data% 6.32
→ 実際の使用量:
500GB × 0.0632 ≒ 31.6GB
この結果、全 VM の実使用量を合計すると 150GB 前後であることが分かった。
結論
移行先サーバのT340 HDD 1TB で全 VM を問題なく収容できる。
3. 移行先(T340)に Proxmox を新規インストール
iDRAC 経由で Proxmox ISO をマウントして通常通りインストールする。
Install Proxmox VE (Graphical)を選択。
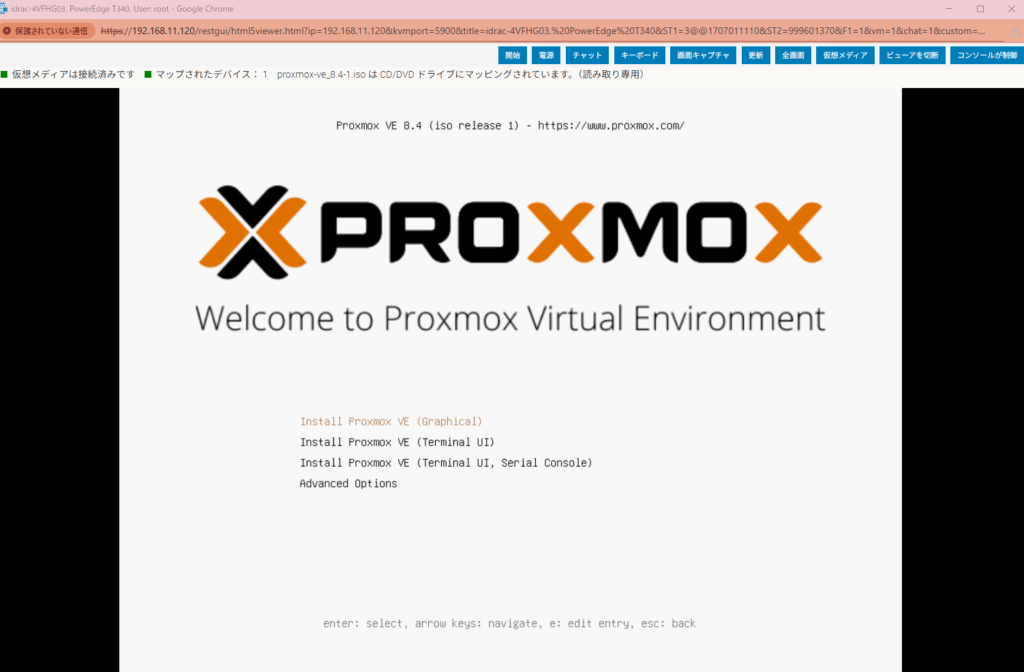
ログインプロンプトが出ることを確認

インストール後は特に設定追加等はしていない。
4. 故障NVMe 側で仮想マシンのバックアップする
幸いにもSSH接続は可能だったためvzdumpを使用して仮想マシンのバックアップを取得した。
バックアップコマンド
vzdump (仮想マシンID) --mode=stop --compress=zstd --storage local --mode=stop
zstd は高速で圧縮率も良い
仮想マシンごとに毎回コマンドを打つのが面倒なので今回はワンライナーですべての仮想マシンをバックアップする。
for i in 100 101 102 104 105 106 107 108 109 110 111; do vzdump $i --mode=stop --compress=zstd --storage local || exit 1; done
root@pve:~# for i in 100 101 102 104 105 106 107 108 109 110 111; do vzdump $i --mode=stop --compress=zstd --storage local; donefor i in 100 101
INFO: starting new backup job: vzdump 100 --storage local --compress zstd --mode stop
ERROR: Backup of VM 100 failed - unable to find VM '100'
INFO: Failed at 2025-11-08 14:56:31
INFO: Backup job finished with errors
job errors
INFO: starting new backup job: vzdump 101 --storage local --mode stop --compress zstd
INFO: Starting Backup of VM 101 (qemu)
INFO: Backup started at 2025-11-08 14:56:32
INFO: status = stopped
INFO: backup mode: stop
INFO: ionice priority: 7
INFO: VM Name: 12.115-ESXi-8.0U3
INFO: include disk 'sata0' 'local-lvm:vm-101-disk-0' 32G
INFO: creating vzdump archive '/var/lib/vz/dump/vzdump-qemu-101-2025_11_08-14_56_32.vma.zst'
INFO: starting kvm to execute backup task
INFO: started backup task '048dbdfd-111b-48f8-85b7-7cfe57a9422f'
INFO:  45% (14.6 GiB of 32.0 GiB) in 3s, read: 4.9 GiB/s, write: 139.2 MiB/s
INFO:  94% (30.4 GiB of 32.0 GiB) in 6s, read: 5.3 GiB/s, write: 69.7 MiB/s
INFO: 100% (32.0 GiB of 32.0 GiB) in 7s, read: 1.6 GiB/s, write: 12.0 KiB/s
INFO: backup is sparse: 31.39 GiB (98%) total zero data
INFO: transferred 32.00 GiB in 7 seconds (4.6 GiB/s)
INFO: stopping kvm after backup task
INFO: archive file size: 580MB
INFO: Finished Backup of VM 101 (00:00:08)
INFO: Backup finished at 2025-11-08 14:56:40
INFO: Backup job finished successfully
INFO: starting new backup job: vzdump 102 --storage local --compress zstd --mode stop
(省略)
バックアップファイルは /var/lib/vz/dump/ に生成される
バックアップ実施
バックアップの実施にあたって問題になったのが500GBとっていた仮想マシンだ。実用量自体は少ないのだが、vzdumpに時間がかかるのと旧マシン側の容量不足エラーが起きたので諦めることにした。
5. rsyncでバックアップファイルを T340 へ転送する
SSD が不安定なため、中断しても続きから再開できる rsync を利用する。
rsync コマンド(旧 Proxmox → T340)
rsync -avh --progress --partial /var/lib/vz/dump/ root@192.168.11.13:/var/lib/vz/dump/
--partial:途中で止まってもファイルを再利用--progress:進行状況を可視化
root@pve:/var/lib/vz/dump# rsync -avh --progress --partial /var/lib/vz/dump/ root@192.168.11.13:/var/lib/vz/dump/rsync -avh --progress
The authenticity of host '192.168.11.13 (192.168.11.13)' can't be established.
ED25519 key fingerprint is SHA256:oDL+Yq4x8K4QMOWjCPajd8GokHJZ9qgkj8EQXGOifsc.
This key is not known by any other names.
Are you sure you want to continue connecting (yes/no/[fingerprint])? yes
Warning: Permanently added '192.168.11.13' (ED25519) to the list of known hosts.
root@192.168.11.13's password:
sending incremental file list
./
vzdump-qemu-101-2025_11_08-15_11_36.log
          1.19K 100%    0.00kB/s    0:00:00            1.19K 100%    0.00kB/s    0:00:00 (xfr#1, to-chk=14/16)
vzdump-qemu-101-2025_11_08-15_11_36.vma.zst
         32.77K   0%   31.25MB/s    0:00:19          118.55M  19%  113.06MB/s    0:00:04          235.18M  38%  112.20MB/s    0:00:03
vzdump-qemu-104-2025_11_08-15_11_46.log
          1.67K 100%    6.99kB/s    0:00:00            1.67K 100%    6.99kB/s    0:00:00 (xfr#3, to-chk=12/16)
vzdump-qemu-104-2025_11_08-15_11_46.vma.zst
(省略)
6. T340 側で VM を順次復元する(qmrestore)
転送完了後、バックアップが揃ったらT340 上で復元する。
単体復元例
qmrestore /var/lib/vz/dump/vzdump-qemu-100-*.vma.zst 100 --storage local-lvm
すべてのVMを同じ順番で復元するワンライナー
ワンライナーで実施する。存在しない仮想マシンがあった場合はスキップされる
for i in 100 101 102 104 105 106 107 108 109 110 111; do \ qmrestore /var/lib/vz/dump/vzdump-qemu-$i-*.vma.zst $i --storage local-lvm; \
done
 root@test:~# for i in 100 101 102 104 105 106 107 108 109 110 111; do \
   qmrestore /var/lib/vz/dump/vzdump-qemu-$i-*.vma.zst $i --storage local-lvm; \
 donefor i in 100 101 102 104 105 106 107 108 109 110 111; do \
   qmrestore /var/lib/vz/dump/vzdump-qemu-$i-*.vma.zst $i --storage local-lvm; \
 done
 can't find file '/var/lib/vz/dump/vzdump-qemu-100-*.vma.zst'
 restore vma archive: zstd -q -d -c /var/lib/vz/dump/vzdump-qemu-101-2025_11_08-15_11_36.vma.zst | v
 CFG: size: 517 name: qemu-server.conf
 DEV: dev_id=1 size: 34359738368 devname: drive-sata0
 CTIME: Sat Nov  8 15:11:37 2025
   Logical volume "vm-101-disk-0" created.
 new volume ID is 'local-lvm:vm-101-disk-0'
 map 'drive-sata0' to '/dev/pve/vm-101-disk-0' (write zeros = 0)
 progress 1% (read 343605248 bytes, duration 1 sec)
 progress 2% (read 687210496 bytes, duration 2 sec)
 progress 3% (read 1030815744 bytes, duration 2 sec)
 progress 4% (read 1374420992 bytes, duration 2 sec)
 progress 5% (read 1718026240 bytes, duration 2 sec)
 progress 6% (read 2061631488 bytes, duration 2 sec)
 progress 7% (read 2405236736 bytes, duration 2 sec)
 progress 8% (read 2748841984 bytes, duration 2 sec)
 progress 9% (read 3092381696 bytes, duration 2 sec)
 progress 10% (read 3435986944 bytes, duration 2 sec)
 progress 11% (read 3779592192 bytes, duration 2 sec)
 progress 12% (read 4123197440 bytes, duration 2 sec)
 progress 13% (read 4466802688 bytes, duration 2 sec)
 progress 14% (read 4810407936 bytes, duration 2 sec)
(省略)
7. Proxmox の ISO レポジトリも移行する
ISO の保存場所は以下。
/var/lib/vz/template/iso/ISO レポジトリの転送(rsync)
rsync -avh --progress --partial /var/lib/vz/template/iso/ \
root@192.168.11.13:/var/lib/vz/template/iso/
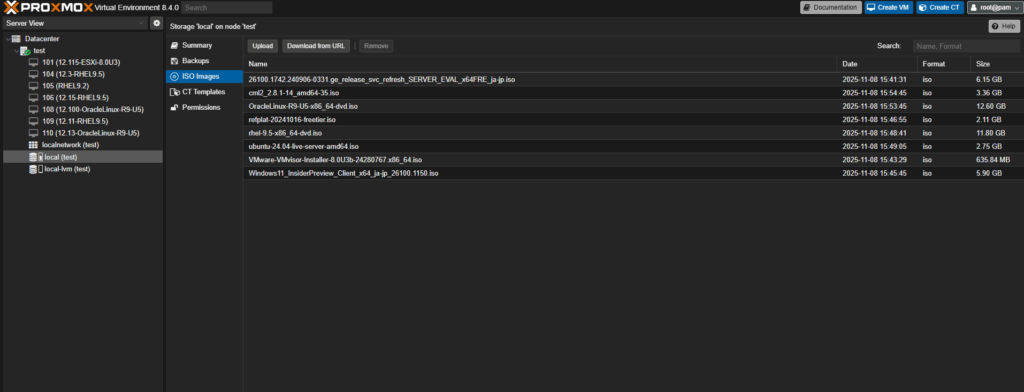
T340側の GUI で
local → ISO Images に ISO が表示されれば成功。
まとめ
今回の移行で重要だったポイントは以下の通り。
- 壊れかけのNVMeはSMARTが正常でも信用してはいけない
lvsの Data% により「本当のデータ容量」を把握する- 大容量VMでも実使用が少なければバックアップは小さいがバックアップに時間がかかる
- T340 にProxmoxを新規構築し、qmrestoreで安全に復元する
- ISO の移行は転送するだけで済む
この手順を踏むことで、
旧環境の深刻なディスク障害にも関わらず、
なんとか仮想マシンを安全にDell T340へ移行することができた。